
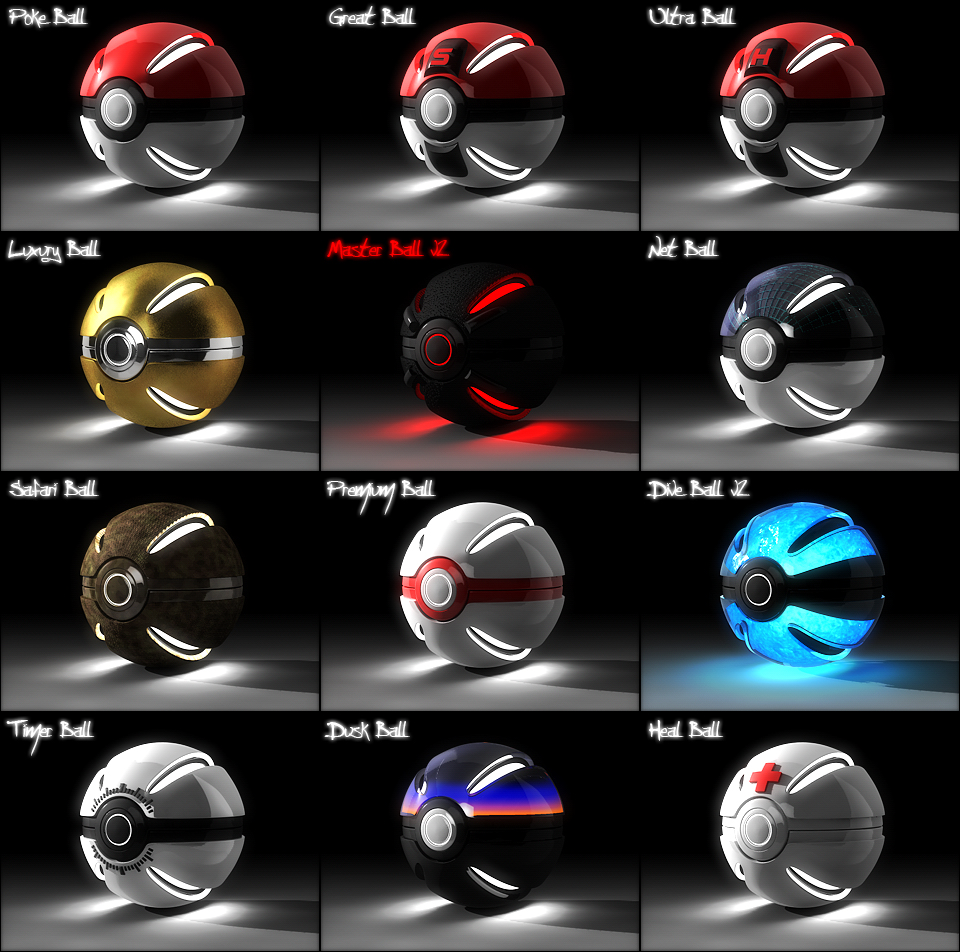
I have, in the past, made pokéballs that I thought (and still think) looked really nice, and one place where they differ is there is a greater sense of thickness to them:

The first layer I want to add is the glowing stuff that will be seen through the gaps in the real shell. I want it to look like there's some complex glowing circuitry, and I also want to reuse this base pokéball for all the others I make.
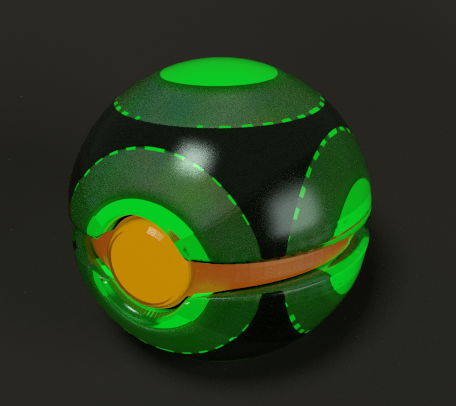
My first attempt at a pokéball, quite a while back, was a new take on the Dusk Ball, where the shell was crystal, over some glowing stuff:
First, ditch the red and white materials for an underlayer material, which in this case shall be pale gray. Then, make sure your 3D cursor is centered on your ball assembly, and add a circle:

Now tab into edit mode and move that sucker along the Z axis to the top of the ball. Extrude it twice.


Duplicate your mesh and, using rotated by 90 degress around an axis (R, Y, 90 for the Y), make it line up with each side of the top half of your ball. Then delete everything not over a shell.

Now model interior circuitry between the circles as you like.

Add a Shrinkwrap modifier targeting the upper shell. Apply the Shrinkwrap, tab into edit mode, set the pivot to the 3D cursor, extrude (E), and scale.
Fair warning: It would be easier and better to do this with textures. I'm using geometry because I'm stubborn and annoying that way. I'll do a texture version later.


Let's try making Pokéball materials out of glass...

Okay, I want to do a couple of things. First off, you can see the gap between the outer shell and the inner shell. I want that gone. So, let's make a rim that lines the inside of the ball. Duplicate the bottom line of vertices on the shell, scale out, shrinkwrap down, and away we go:


How did you get the material for the pattern? I can't figure out how you got it like that...
ReplyDelete